E72+E80 MATLAB Tutorial
Welcome to the E72+E80 MATLAB Tutorial! If you need more support, ask someone during E72 office hours. Also, there are lots of resources online for using MATLAB.
What to Submit
At the end of this assignment you will submit pieces of information:
- A screenshot showing you’ve completed the assigned sections of the MATLAB On-ramp tutorial.
- A screenshot of your completed
debugme.mscript file. - A brief, 2-3 sentence reflection detailing something you learned from the plotting question.
- A brief, 4-5 sentence reflection detailing something you learned from the debugging practice.
You should prepare these items in an MS Word document or Google Doc and then download it as a PDF to submit on Canvas.
MATLAB Tutorial
1. Installing MATLAB on your personal computer
There is a version of MATLAB that you can run in the cloud via a browser, but because we’ll be using MATLAB a lot in this class, so we recommend that you install it on your personal computer. To do so, follow these instructions. Please install MATLAB R2023b or later.
Important: When you are installing MATLAB, you’ll be asked what packages you want included. For E72, you need at minimum the following toolboxes:
- Curve Fitting Toolbox
- Optimization Toolbox
- Signal Processing Toolbox
- Symbolic Math Toolbox
If you’ve previously installed MATLAB, you can add the packages by going through the installation process again. To see what packages you have installed, type “ver” at the command window. You can also install packages within MATLAB by clicking on Apps, then Get More Apps, typing in the name of the toolbox in the search bar, and making sure Toolboxes and Products is checked under Filter by Type on the left side bar. If you get an error Your administrator has restricted your download access..., first try restarting MATLAB.
There are lots of videos on MATLAB online. For example, if you want to know how to use fsolve, you can search “MATLAB fsolve tutorial” on YouTube.
2. MATLAB Onramp
First, you will learn some basics of MATLAB using the MATLAB Academy tutorial called Onramp. Note that Onramp does not require you to install MATLAB, since it uses an online programming environment that simulates MATLAB’s look, feel, and functionality.
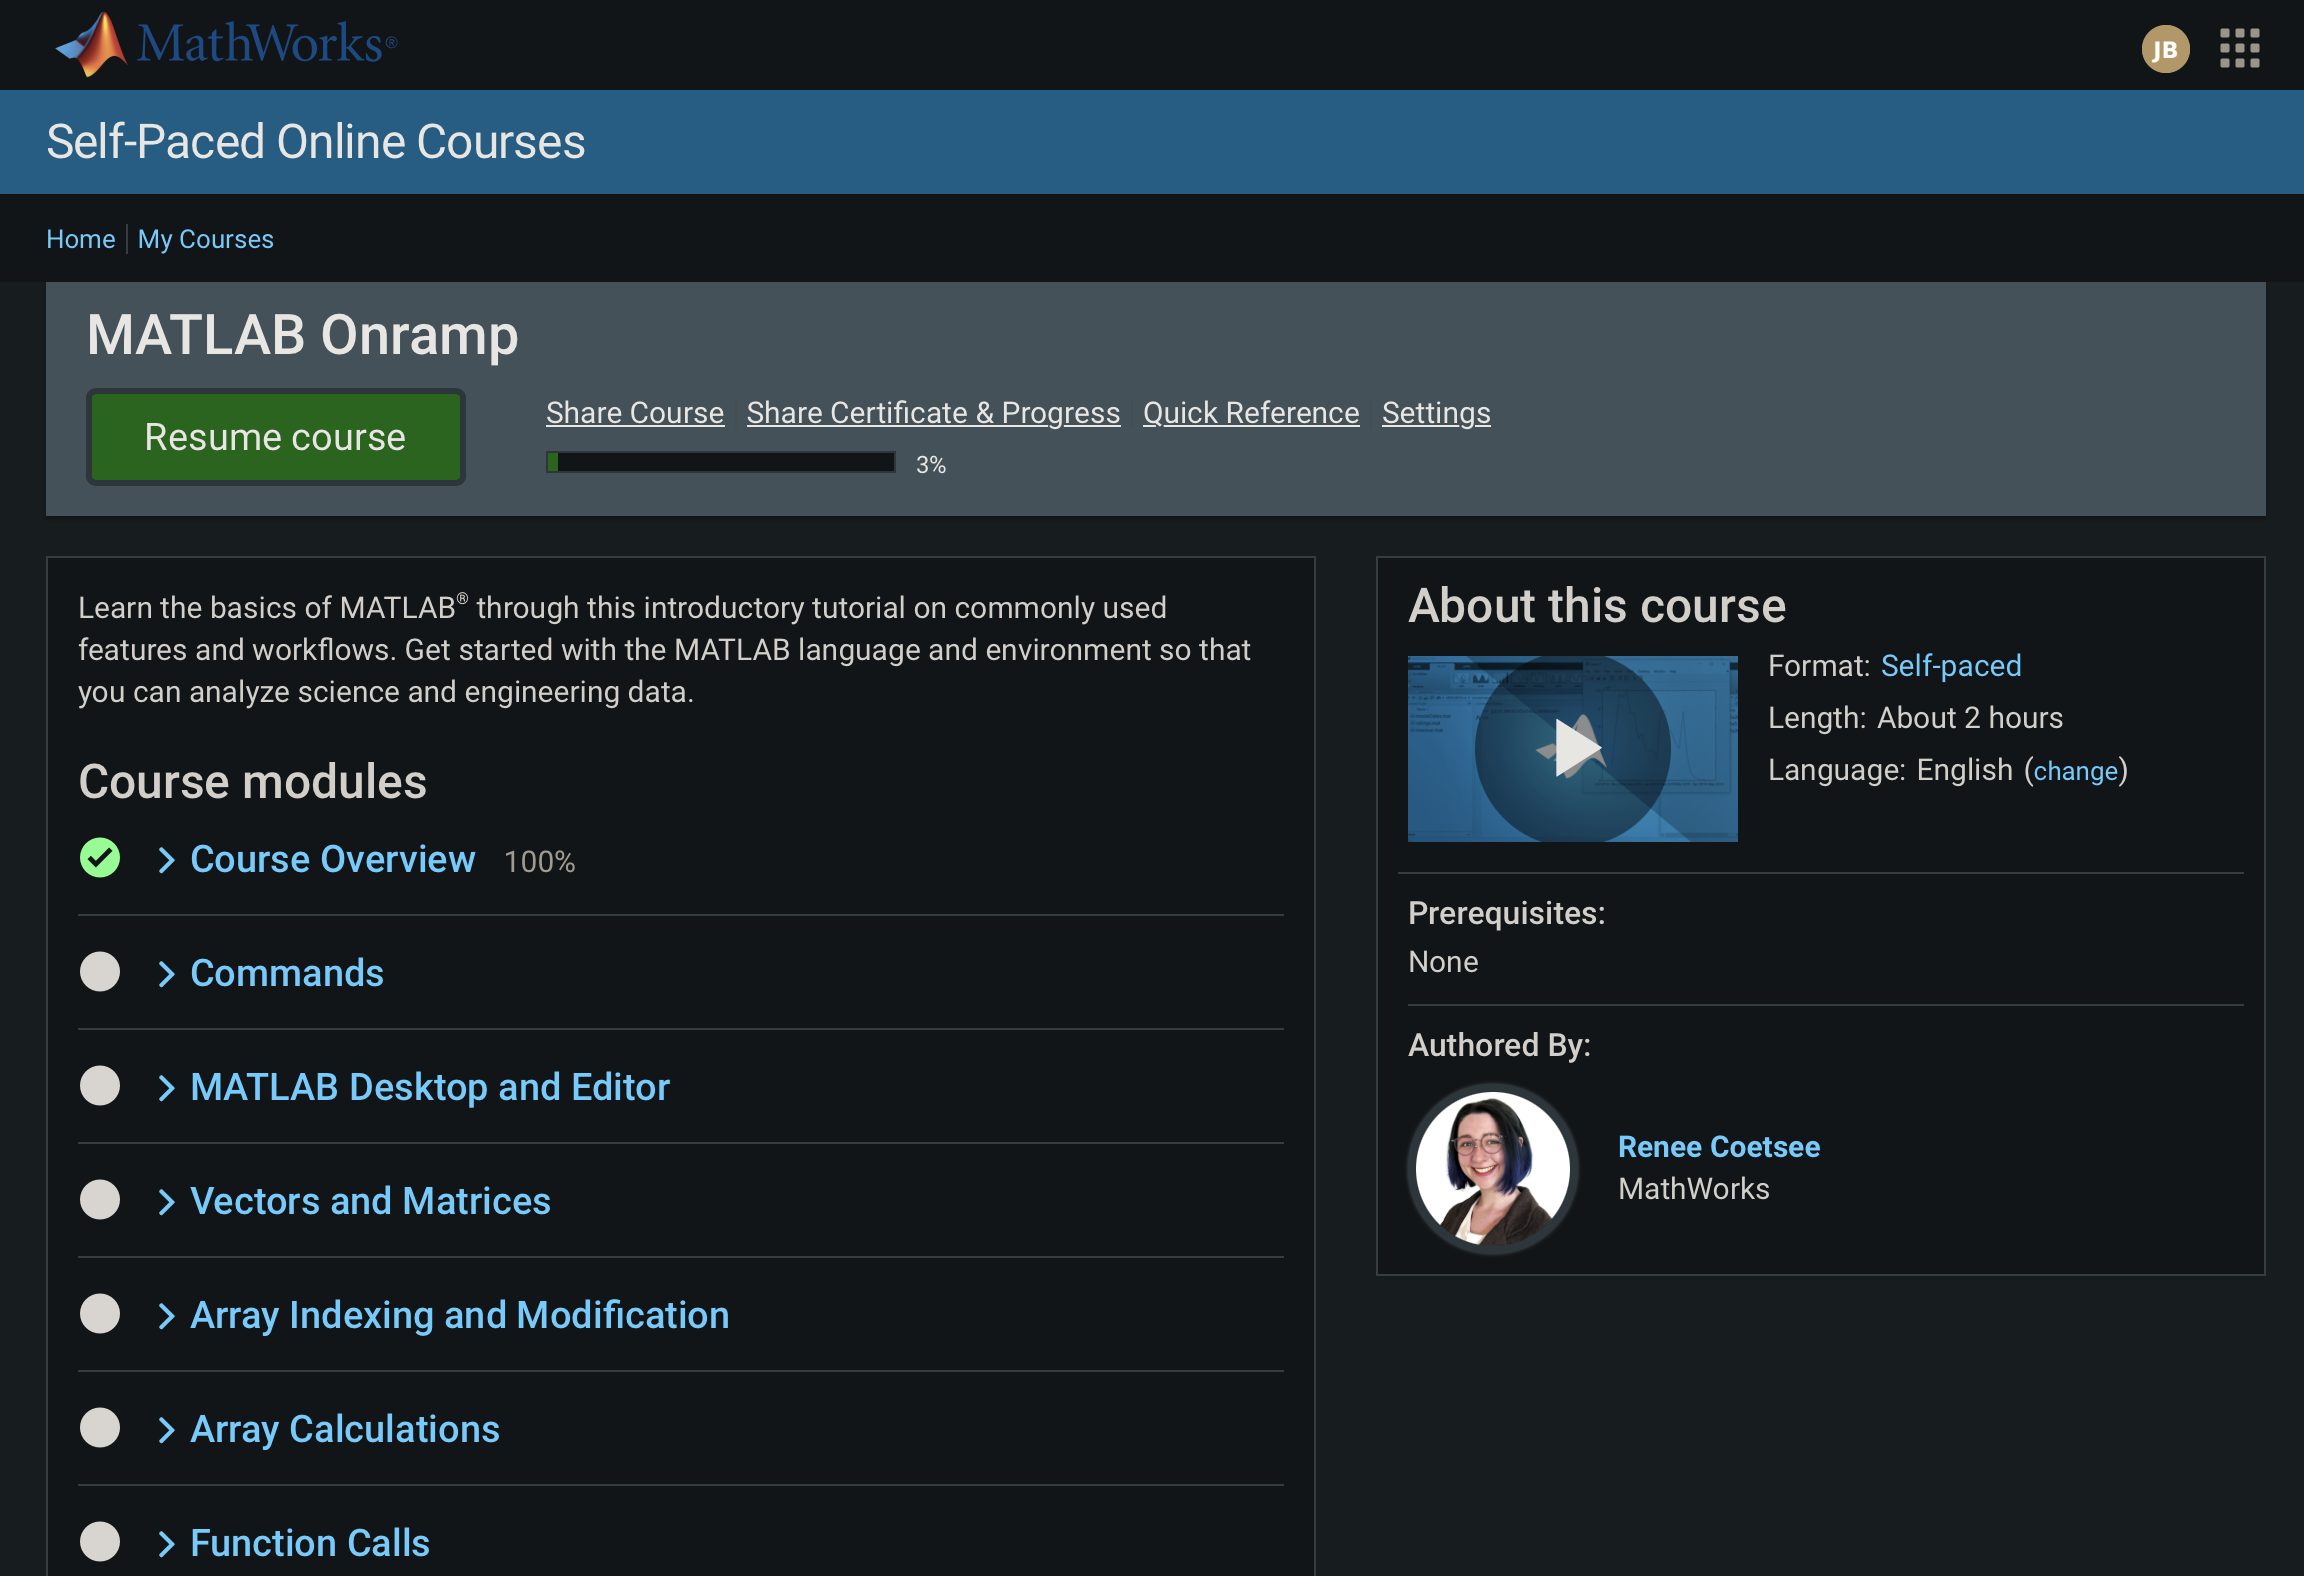
- Navigate to the MATLAB Onramp self-paced online course. You will need to login using the account that you created earlier.
- Complete the following modules of Onramp:
- Course Overview
- Commands
- Vectors and Matrices
- Array Indexing and Modification
- Array Calculations
- Data Import
Feel free to explore other parts of this too to build your confidence with MATLAB.
Once you’ve finished the modules in the list above, take a screenshot of the Course modules pages which shows your progress and green checkmarks next to the segments you’ve completed. You’ll need to submit this screenshot for this assignment.
3. MATLAB Plotting Video
Watch this 17-minute video to learn how to create various 2-D and 3-D graphs in MATLAB.
We strongly recommend that you don’t watch the videos passively. Instead, pause frequently while watching the video so that you can try things out on your own in MATLAB.
4. MATLAB Debugging Tips
Watch this second 17-minute video to learn how to find and fix errors in your MATLAB code. This skill will greatly aid you in all classes that require the use of MATLAB.
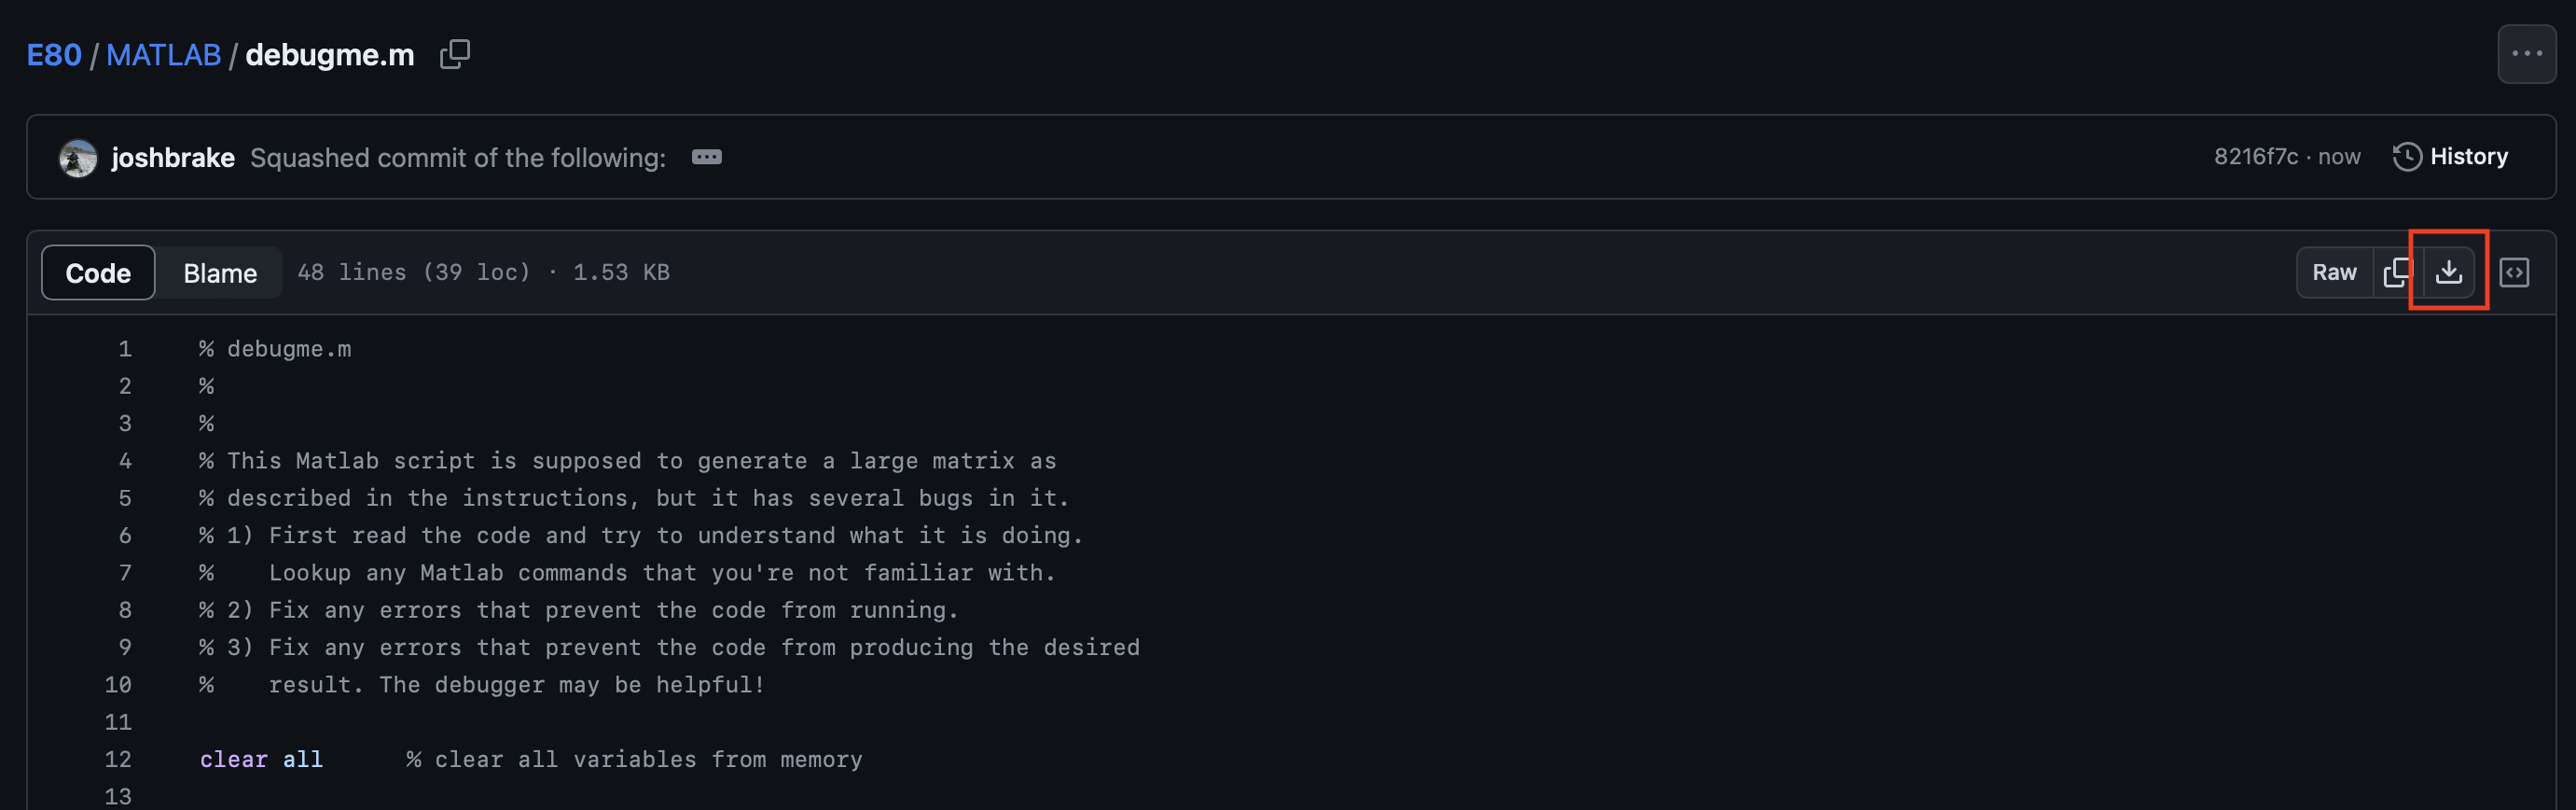
If you want to try using the debugger yourself with this piece of code, download debugpractice.m.
To download the file, you can click the little downward pointing arrow in the toolbar at the top right of the code.
5. Practice Debugging in MATLAB
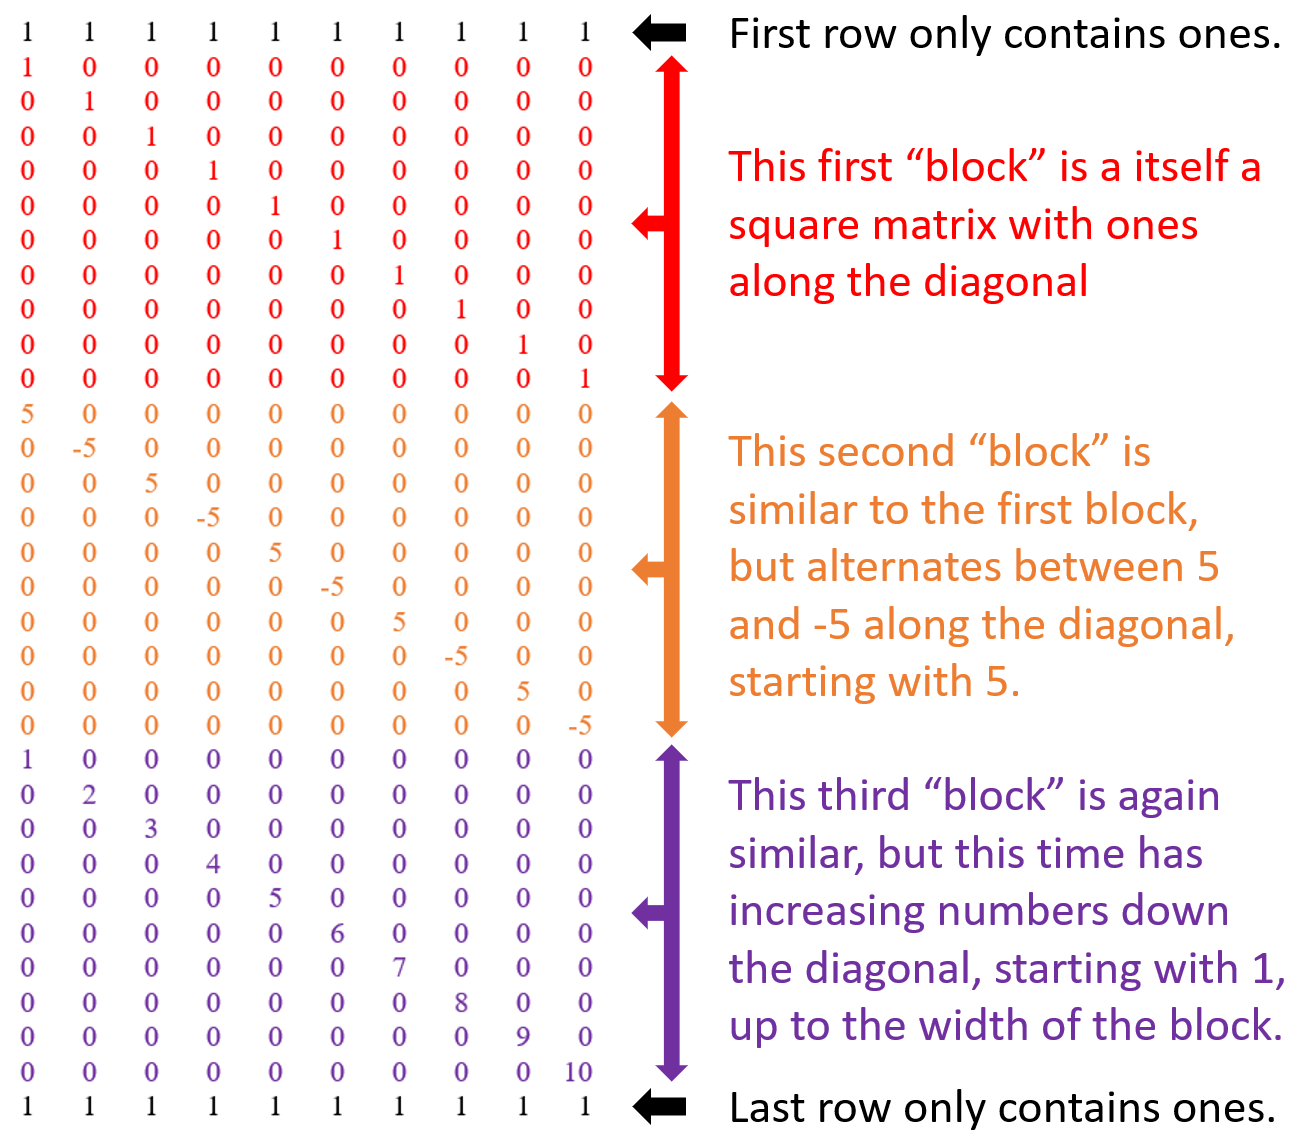
Practice your MATLAB debugging skills on this script debugme.m, which is supposed to create a matrix like the one below.
The code should be able to produce a matrix with a user-specified number of columns. In the diagram below, we show what the output matrix should look like if it has 10 columns. The number of rows in this case would need to be 32, since the matrix has three 10x10 blocks in the middle, sandwiched by the row of ones at the top and row of ones at the bottom.
In MATLAB, if you create a matrix with a certain size and then you try to assign an element of that matrix outside of its existing dimensions, MATLAB won’t give you an error. Instead, it will just extend the matrix outward as large as necessary to accommodate that new element.